
Who can do what
People assigned to specific sites see only the equipment located at those sites, and can act only on that equipment. Equipment with no location is visible only to people with access to every site. For the two task rows, a site admin counts as an admin for the equipment at their own site.
Open Equipment
In the left navigation, under Lab operations, choose Equipment (the path is/equipment). The page opens with two metric tiles, a row of type filters and the equipment table, grouped by type and sorted by name. The + button next to the heading adds equipment; Search equipment… filters the table as you type. An organization that has not added anything yet sees No equipment added with the note Track service and key dates by adding your equipment.
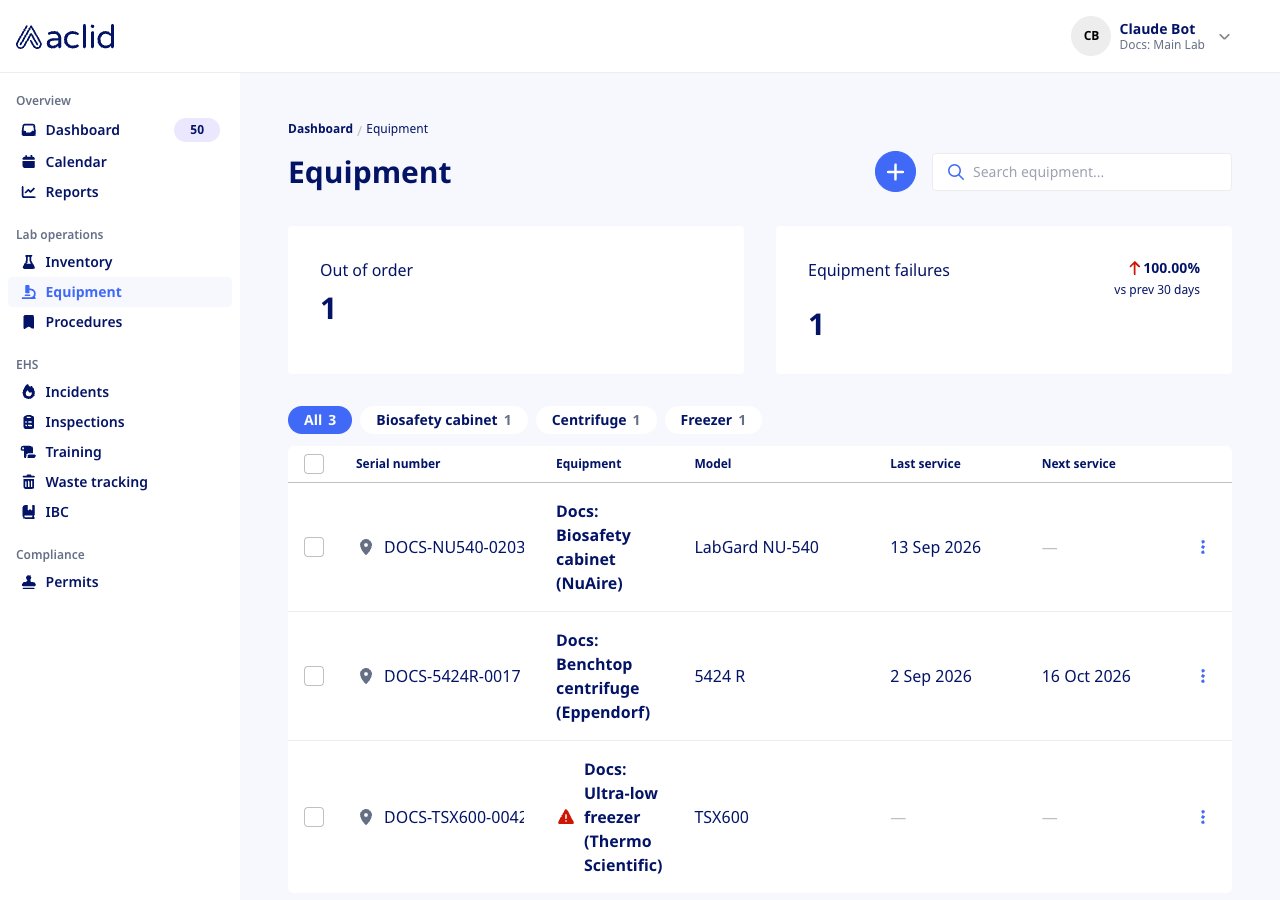
The equipment list with its metric tiles and type filters
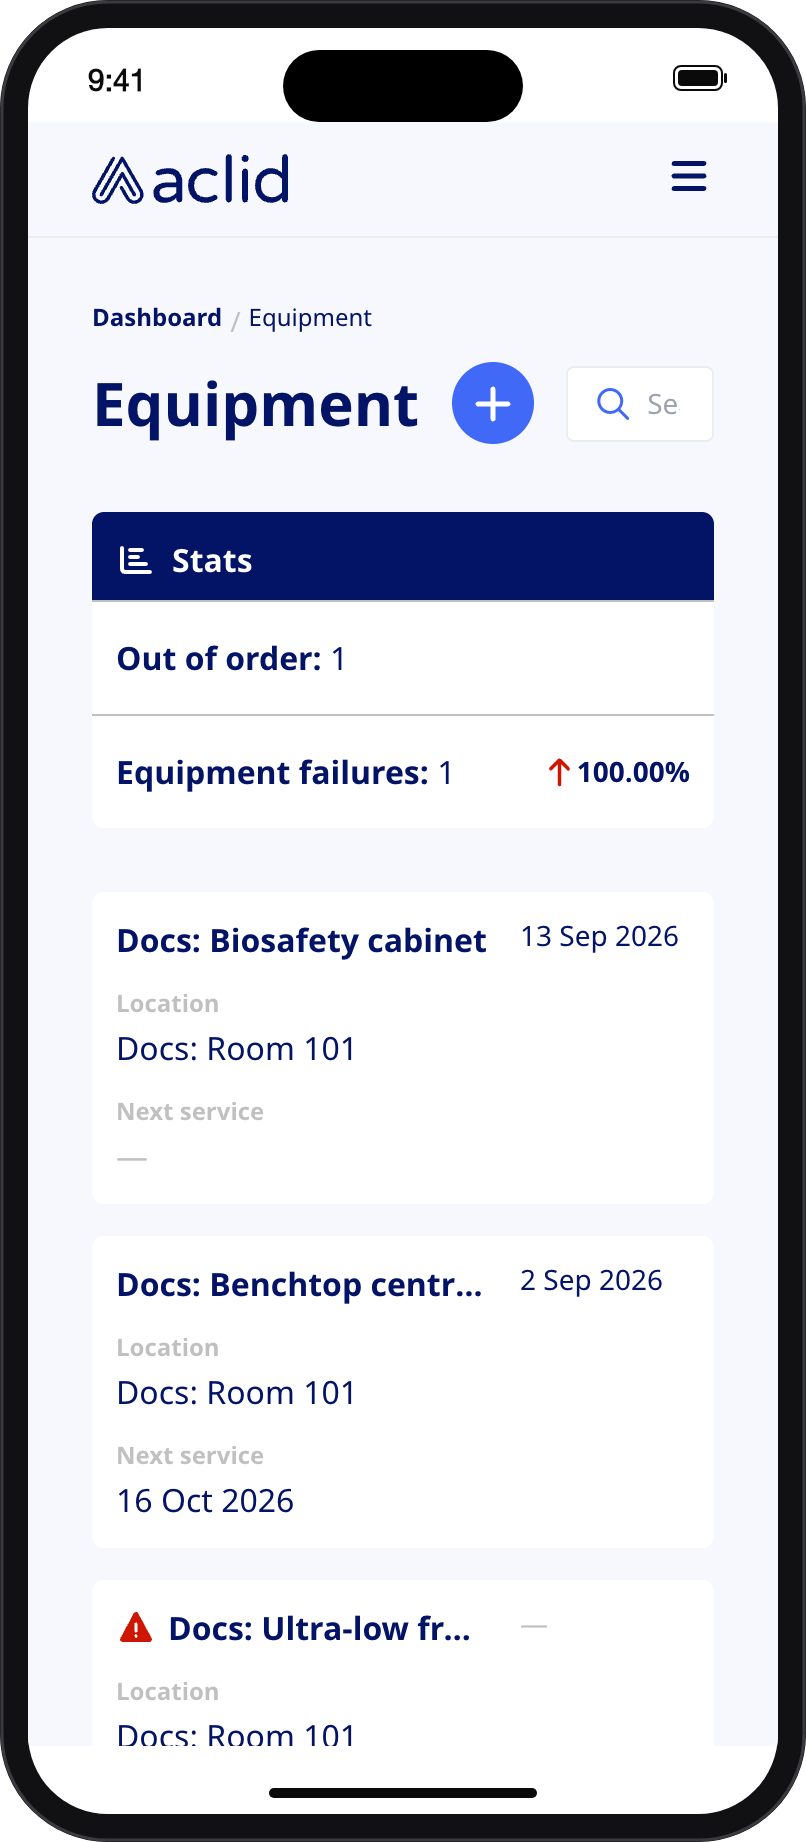
The same list on a phone: a Stats card, then one card per item
Key concepts
- Equipment: one instrument or device, identified by its name and manufacturer and optionally a model, serial number, type and location.
- Status: either Operational (green badge) or Out of order (red badge). Out-of-order items also carry a red warning triangle in the list. Every change of status is recorded with the date and the person who made it; those records feed the Equipment failures tile.
- Type: a free label such as Centrifuge or Freezer, used to group the list. Pick an existing type or add a new one when you create or edit equipment. Equipment without a type is listed under Uncategorized.
- Service entry: one piece of work done on the equipment, dated, with a type, a provider, optional notes and optional PDF documents. The types are Calibration, Inspection, Part replacement, Cleaning, Repair, Preventative maintenance and Other.
- Service provider: who did the work: one of your users, an outside contractor you have named before, or a new Outside contractor you name on the spot. Contractors you name are remembered for next time.
- Maintenance schedule: a recurring plan for one service type, with a frequency, a first date and an optional assignee. It generates events on the Calendar two years ahead and a task 30 days before each event.
- Last service and Next service: the date of the most recent service entry, and the earliest upcoming schedule date. Equipment without a schedule shows the Next service date entered under its key dates, if any.
Tasks
Add equipment
- On the Equipment page, click the + button next to the heading.
- In Add equipment, enter the Name and Manufacturer; both are required.
- Optionally pick a Type (optional), or type a new one and choose Add ”…”. Status starts as Operational. If your organization has sites, choose a Location.
- Click Add equipment. The new record’s detail page opens, where you can add the model, serial number, key dates and a manual.
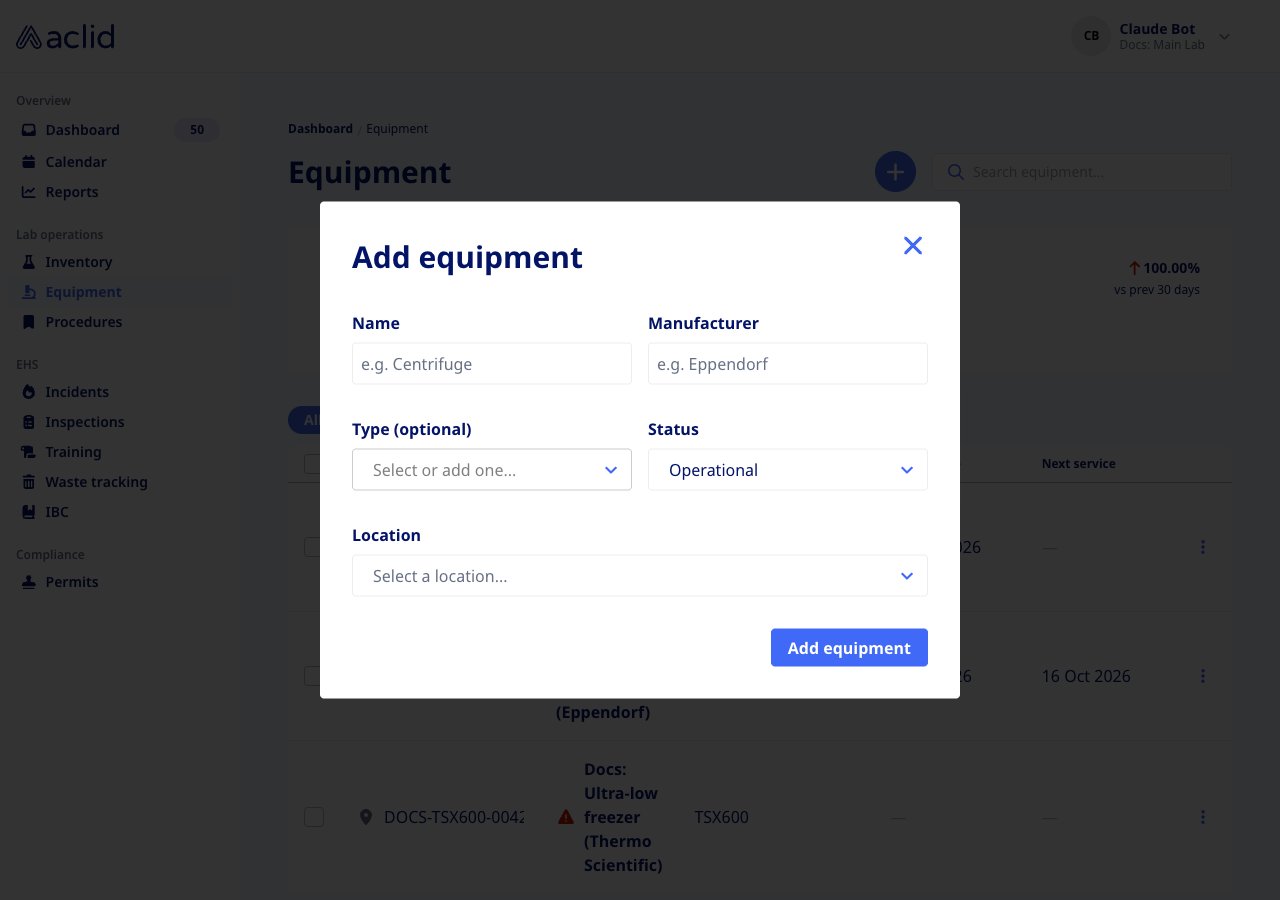
The Add equipment dialog
Review an item and change its status
- Click a row in the list, or open its ⋮ menu and choose Details. The detail page shows the status badge, the location, type, model and serial number, then Key dates (Last service, Next service, Acquired), Additional details, Maintenance schedules, Service log, Manual and, when a maintenance task is open, Actions.
- Click Update to open Edit details. Change Status between Operational and Out of order, correct the name, manufacturer, model, serial number, type or location, then click Save changes. The badge updates at once.
- Use Edit on Key dates to set Acquired (optional) and Next service date (optional), and Edit on Additional details to keep free-form fields such as a warranty end or service contract number (Add field, then a Field name and Value; a value that starts with http becomes a link).
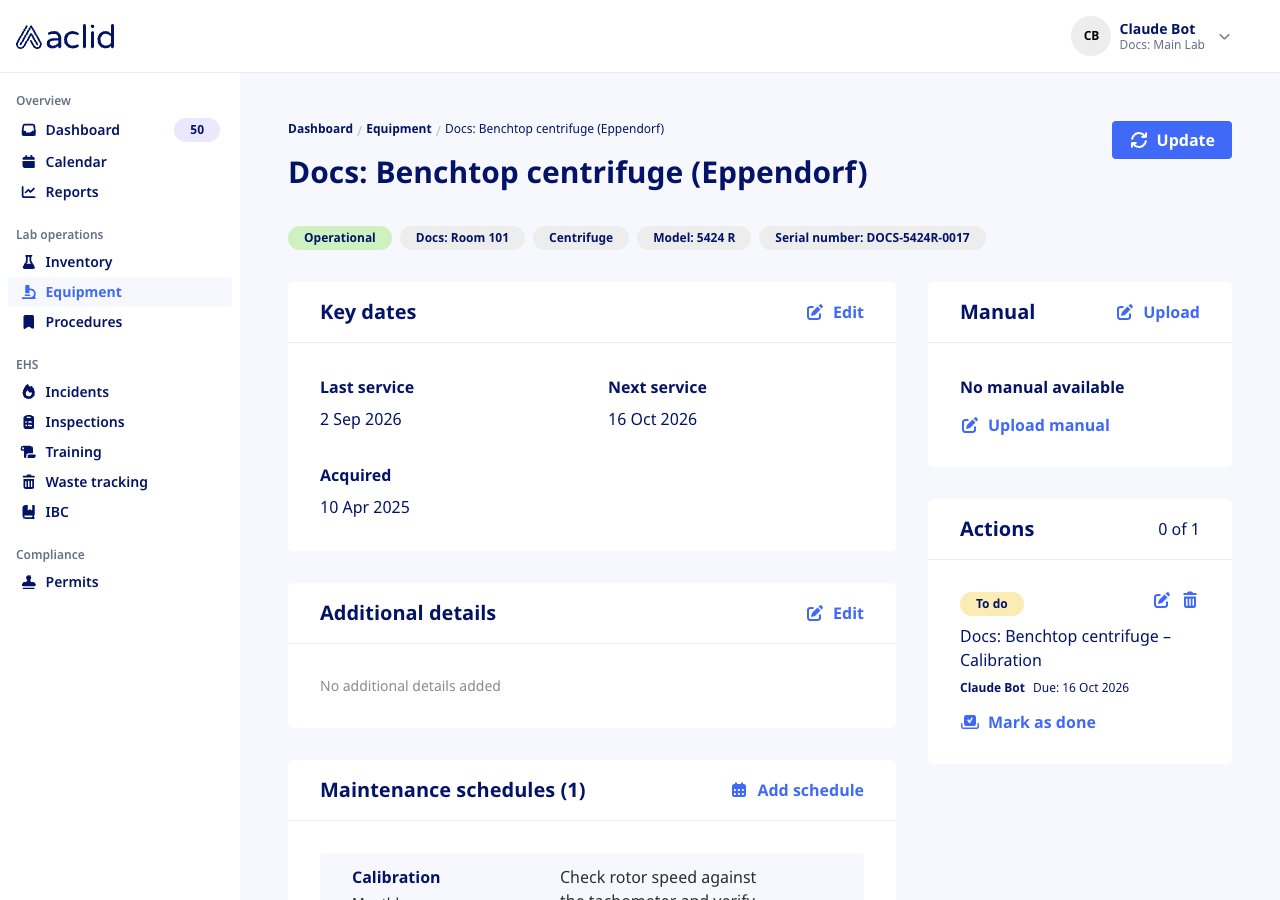
The detail page of a centrifuge with its badges, key dates and open maintenance task
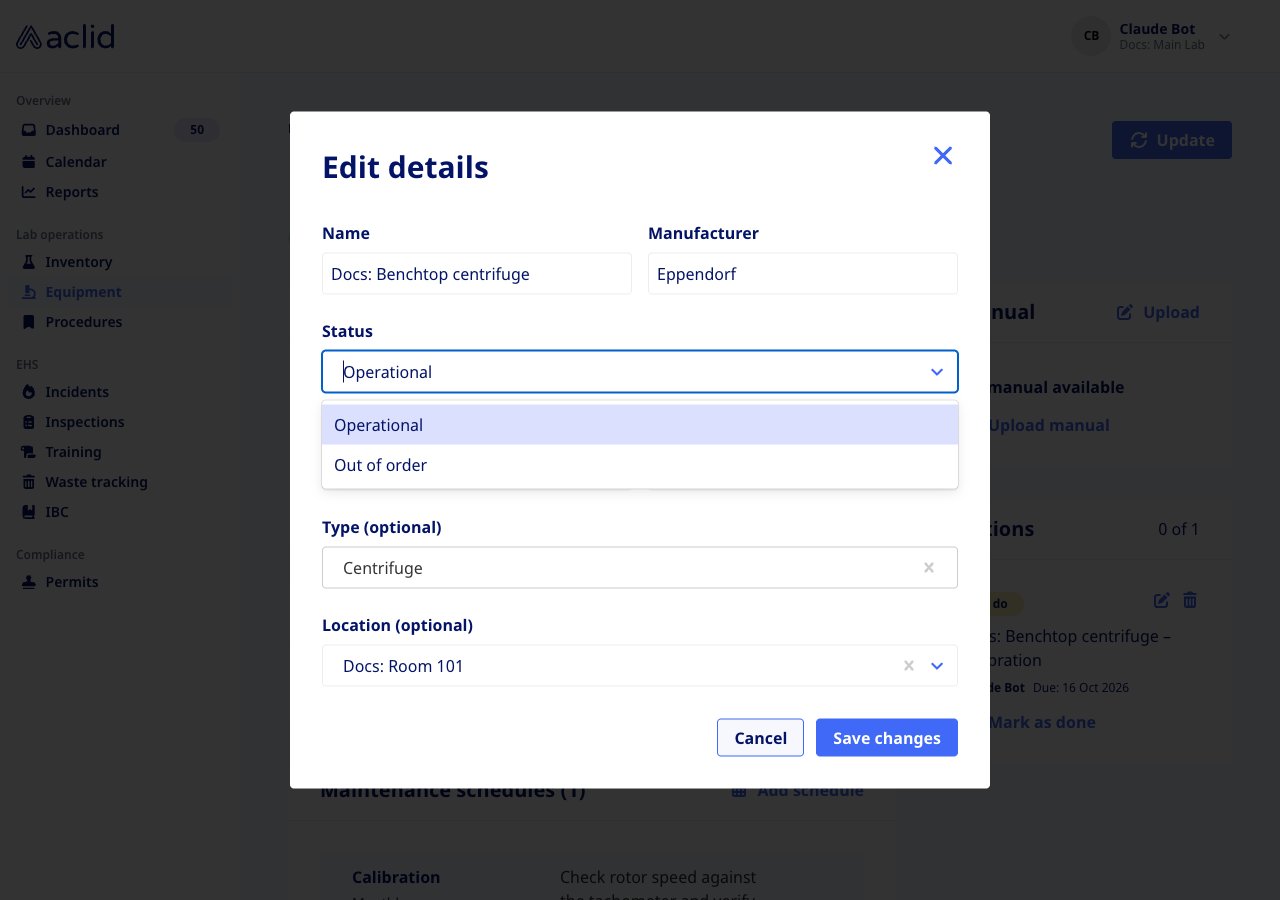
Changing the status from the Edit details dialog
Track service
- On the detail page, click Track service in the Service log card.
- Set the Date of service (today or earlier) and the Type of service.
- Choose the Service provider. Pick a user or a known contractor, or choose Outside contractor and enter the name and/or company name in the Outside contractor field that appears.
- Add Notes (optional) describing what the service included, and drop PDF documents under Documents (optional), such as a calibration certificate.
- Click Track service. The banner Service tracked appears, the entry tops the Service log and Last service updates. The pencil on an entry opens Edit service entry, where you can also remove a document.
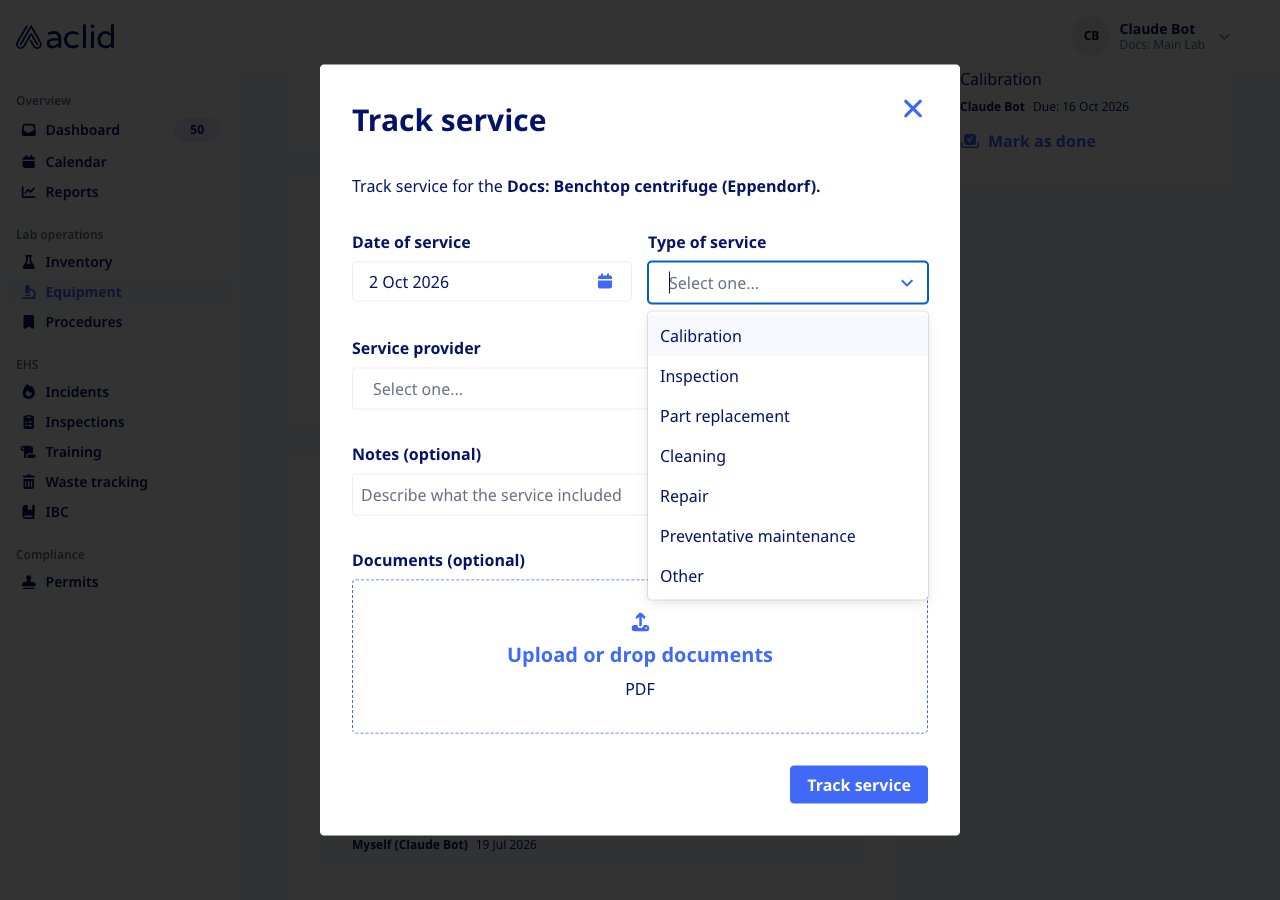
The Track service dialog with the seven service types
Add a maintenance schedule
- On the detail page, click Add schedule in the Maintenance schedules card.
- In Add maintenance schedule, pick the Maintenance type and the Frequency: Weekly, Every 2 weeks, Every 3 weeks, Monthly, Quarterly, Every 2 months, Every 4 months, Semi-annually, Annually or Every 2 years.
- Set the First maintenance date (today or later), optionally an Assigned to (optional) user and Notes (optional).
- Click Add schedule. The banner Maintenance schedule added appears and the card lists the schedule with its frequency, Next: date and assignee.
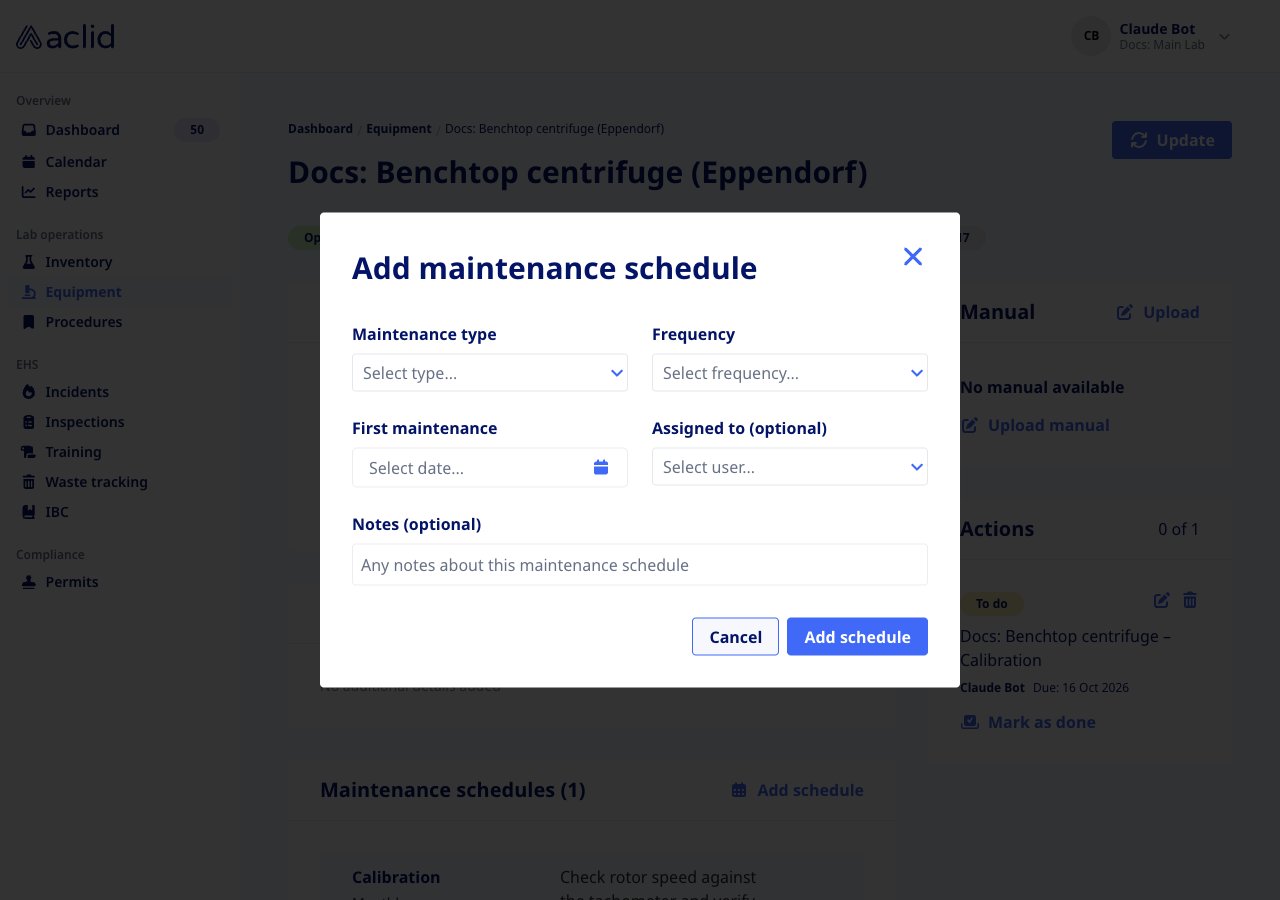
The Add maintenance schedule dialog
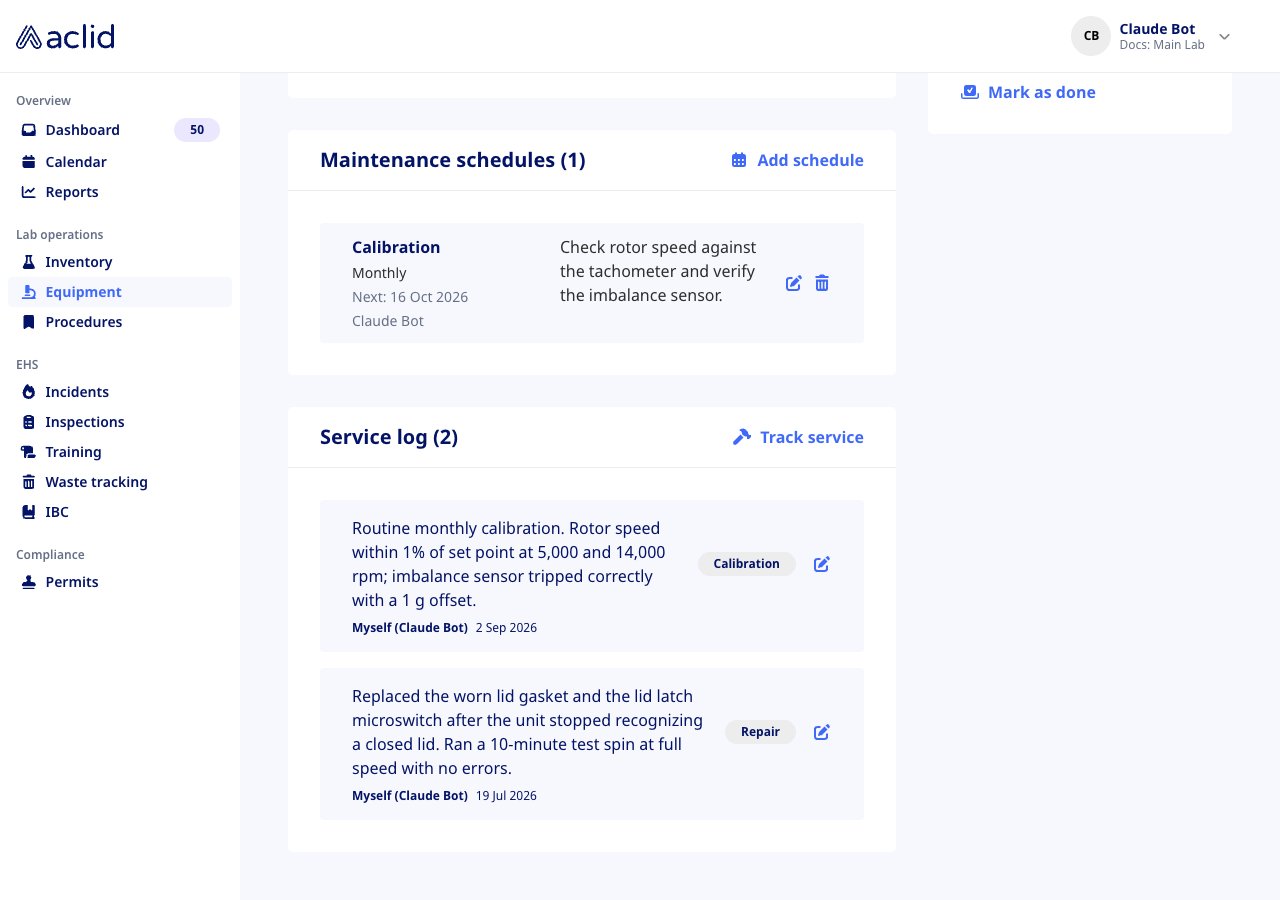
A monthly calibration schedule above the service log, with the two entries that feed Last service
Upload a manual
- On the detail page, click Upload or Upload manual in the Manual card. Once a manual is attached the button reads Replace.
- In Upload equipment manual, drop or choose a PDF, Microsoft Word or Apple Pages file of up to 25 MB and click Upload.
- The banner Manual uploaded appears. A PDF shows its first page in the card; View opens the file in a new tab and Replace swaps it for another.
Reading the list
- Out of order: how many items currently have that status. A dash means none.
- Equipment failures: how many times equipment was set to Out of order in the last 30 days, with the change against the 30 days before.
- Type chips: All with the total, then one chip per type with its count. Click chips to combine types; clicking All resets.
- Serial number: the serial, with a pin icon when the item has a location (hover it to see where). Equipment shows the name and manufacturer, with a red triangle for Out of order. Model, Last service and Next service follow; a dash means not set. A Site column and a site dropdown above the table appear only when your organization has several sites and the header is showing All sites; the dropdown narrows the list to one site.
- Search matches the name, serial number, manufacturer, model, location and the name of anyone who serviced the item. No matches found offers Clear search.
- On a phone each card shows the name, the last service date, the Location and the Next service date; the filters and bulk selection are not available.
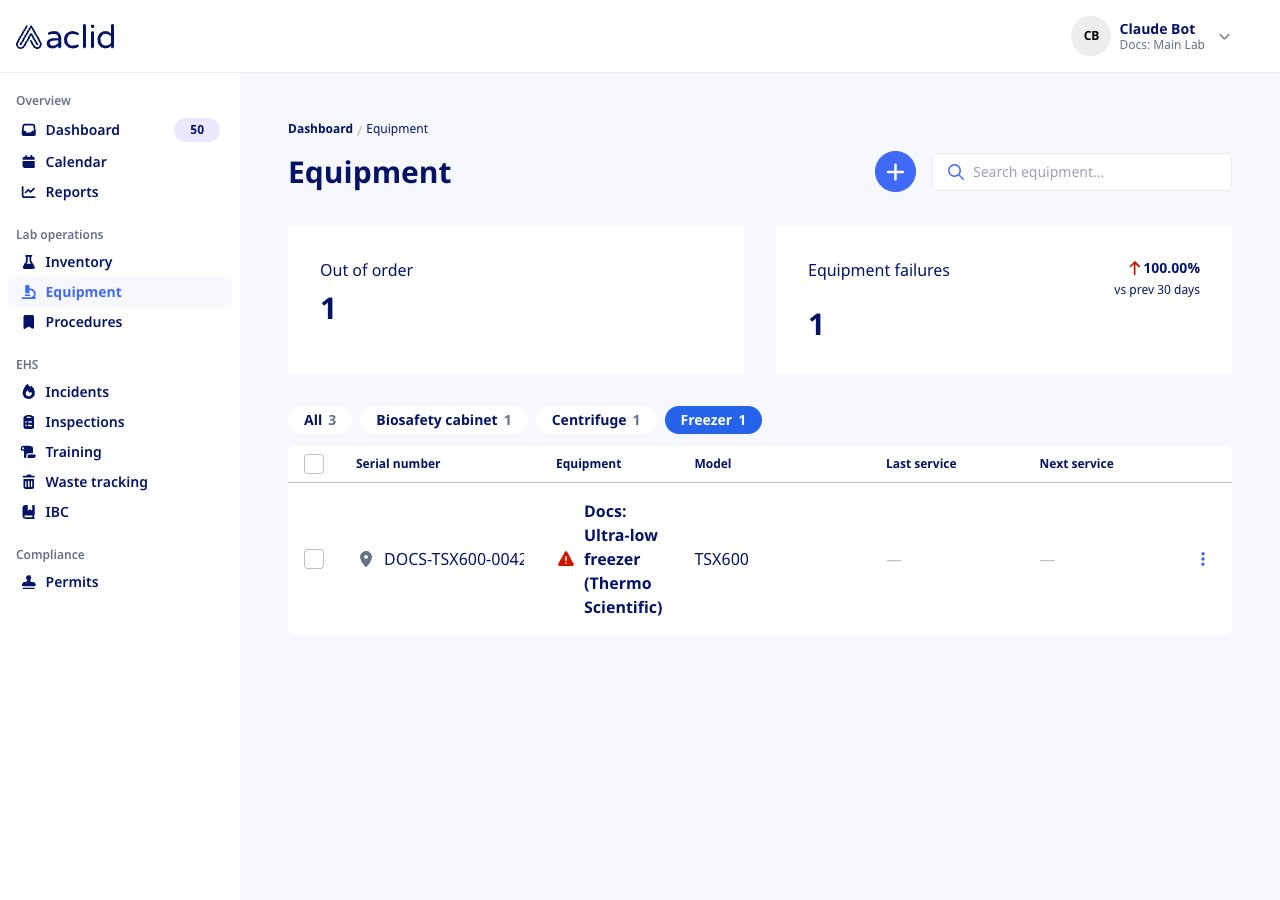
The list filtered to one type; the only row is out of order
Tips and limits
- The equipment list follows the site chosen in the header. If your organization has one site, it is selected automatically and equipment without a location is hidden; give every item a location so it stays visible.
- A service entry dated after today is not accepted, and a schedule’s first date cannot be in the past. Schedule dates are calendar days.
- Setting equipment to Out of order does not pause its schedules or close its tasks; delete or edit the schedule if the item will be out of service for long.
- The status history is not shown on the detail page; it is counted in the Equipment failures tile only.
- Service documents must be PDF; the manual accepts PDF, Word and Pages files. Files over 25 MB are rejected. Deleting equipment or a service entry is not possible from the app.
- Bulk Track service accepts at most 50 items and one document per entry. The selection survives searches and type filters until you clear it.
Related
- Calendar for the maintenance events a schedule creates
- Dashboard for the maintenance tasks and how to mark them done
- Roles and sites for how site assignments limit what you see
- GraphQL reference: Equipment
- GraphQL reference: EventTemplate
- GraphQL reference: equipmentList
- GraphQL reference: createMaintenanceSchedule