
Who can do what
Open Settings
Settings is not in the left-hand navigation. Click your name at the top right of the header, then Settings in the menu that opens. Only admins see that entry. The page opens on the Users tab with a Groups tab beside it. The + button at the top right invites a user while Users is selected and creates a group while Groups is selected.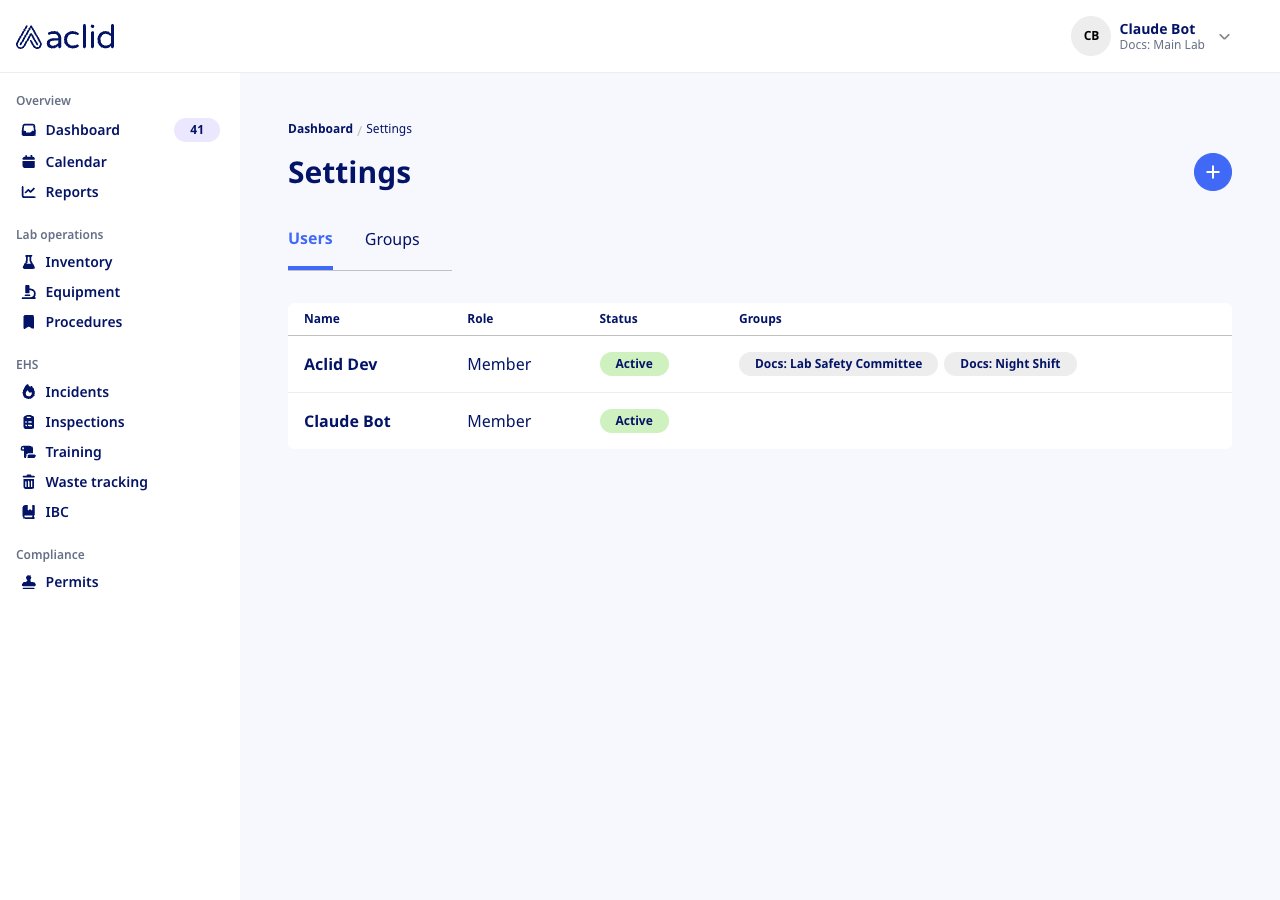
The Users tab, as an admin sees it
Key concepts
- Admin and Member: the two roles in the organization. Admins reach this page and the admin-only modules; members work with their own records and assignments. The role is chosen when a person is invited.
- Site: one of the locations your organization is split into. When there is more than one site, each user is given access to All sites or to specific ones, with an Admin or Member role at each, and the header lets everyone switch which site they are viewing. A user limited to particular sites only reaches records that belong to those sites. With a single site, everyone belongs to it and nothing needs choosing.
- Group: a named set of users, used to assign trainings to many people at once. A user can belong to several groups. On a training template, the Assign dialog offers Assign to user groups as well as Assign to individuals.
- Active: the status shown for every listed user. The list only contains people who have accepted their invitation.
Tasks
Invite a user
Admins only.
- On the Users tab, click the + button at the top right. The Invite user dialog opens.
- Enter the person’s First name and Last name (both optional) and their Work email address (required).
- Under Role, pick Member (the default) or Admin.
- If your organization has more than one site, a Site access field appears with the hint Select “All” to grant access to every site, or choose specific sites. Pick All, or add sites one at a time from Select a site…. Each site becomes a badge such as Main Lab — Member; click its x to remove it. Sites take the role selected under Role at the moment you add them, so a person can be an admin at one site and a member at another. With a single site this field does not appear and the person gets access to that site automatically.
- Click Send invitation. A banner confirms An email invitation has been sent to the person’s first name (or their email address when no name was entered) and adds Once they’ve accepted the invitation, they’ll appear in the “Users” list here.
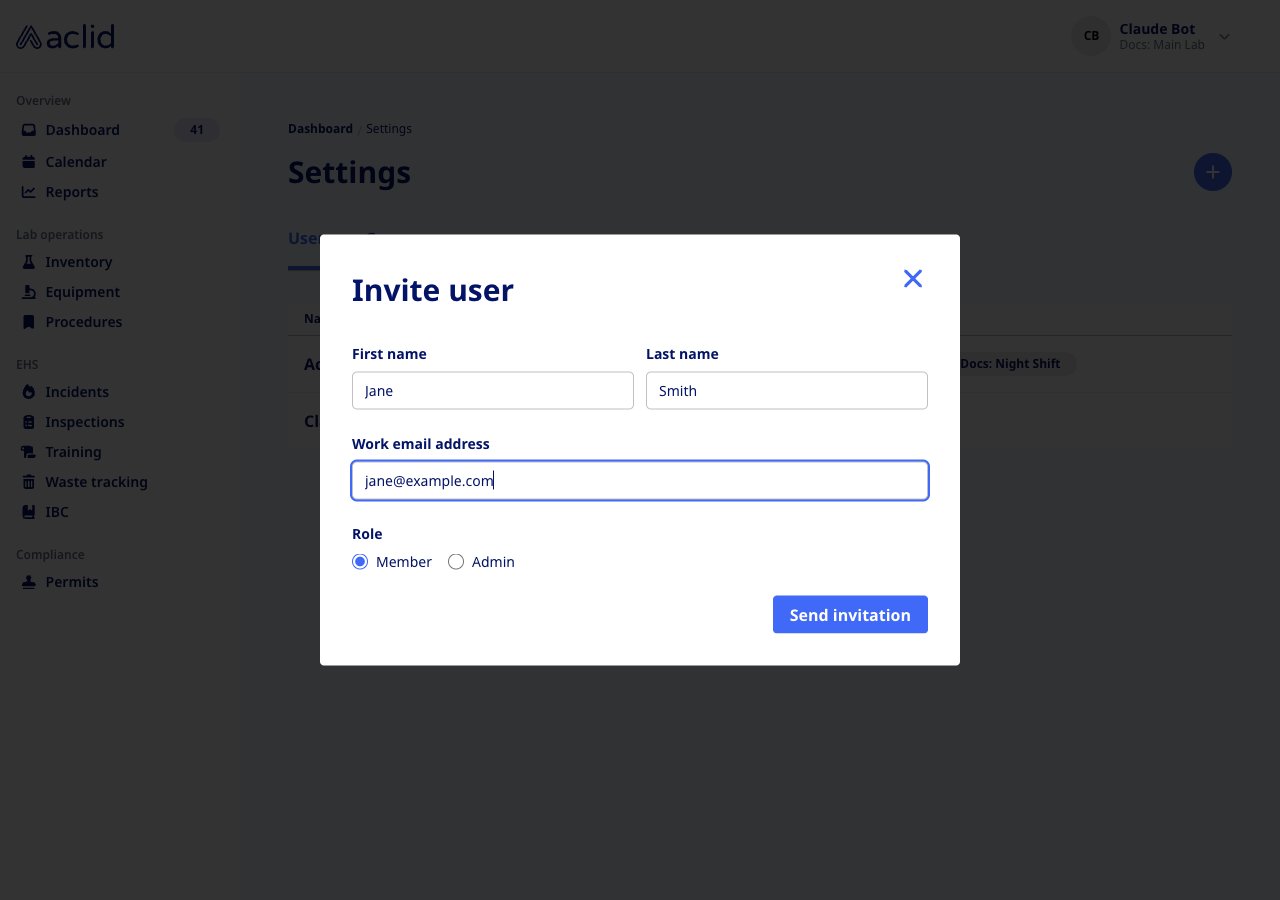
The Invite user dialog for an organization with one site
Create a group
Admins only.
- Open the Groups tab and click the + button at the top right. The Add group dialog opens.
- Type a Group name (required; Create group stays disabled until you do).
- Under Members, pick people one at a time from Select users…. The list offers the people shown on the Users tab, so with a site selected in the header it only offers that site’s members. Each one appears as a badge; click its x to take them out again. You can also leave the group empty and add members later.
- Click Create group. A banner confirms the group has been created and its card appears in the list.
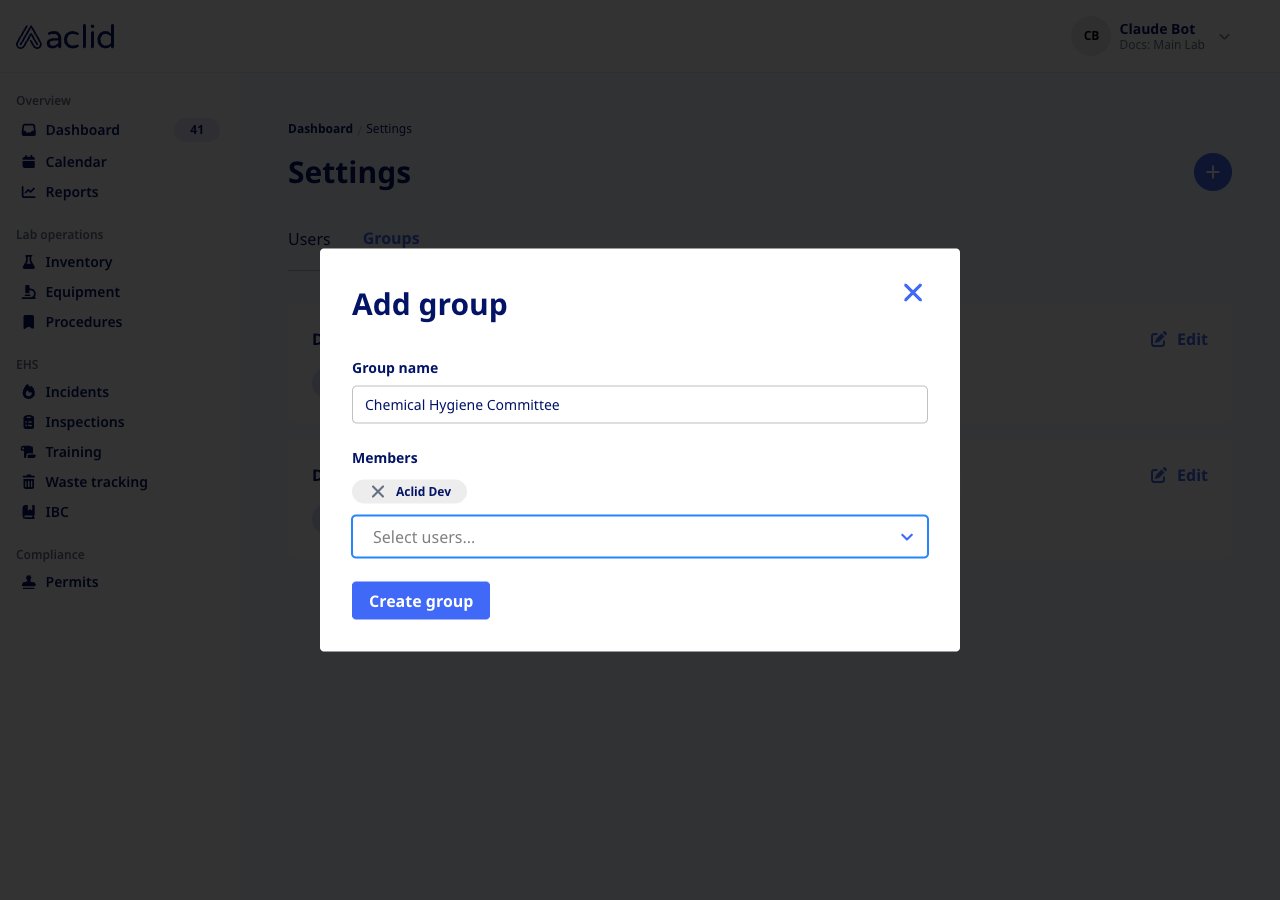
Adding a group with one member picked so far
Change who is in a group
Admins only.
- On the Groups tab, click Edit on the group’s card. A dialog titled with the group’s name opens on its Members, or says No members yet.
- Add people from Select users… and remove them with the x on their badge.
- Click Save. The card’s member count and avatars update. Anyone you added is assigned the trainings the group already has, unless a training is not available at their site. Anyone you removed loses that group’s trainings they have not started yet, unless another group they are still in assigns the same training; trainings already in progress or completed stay as they are.
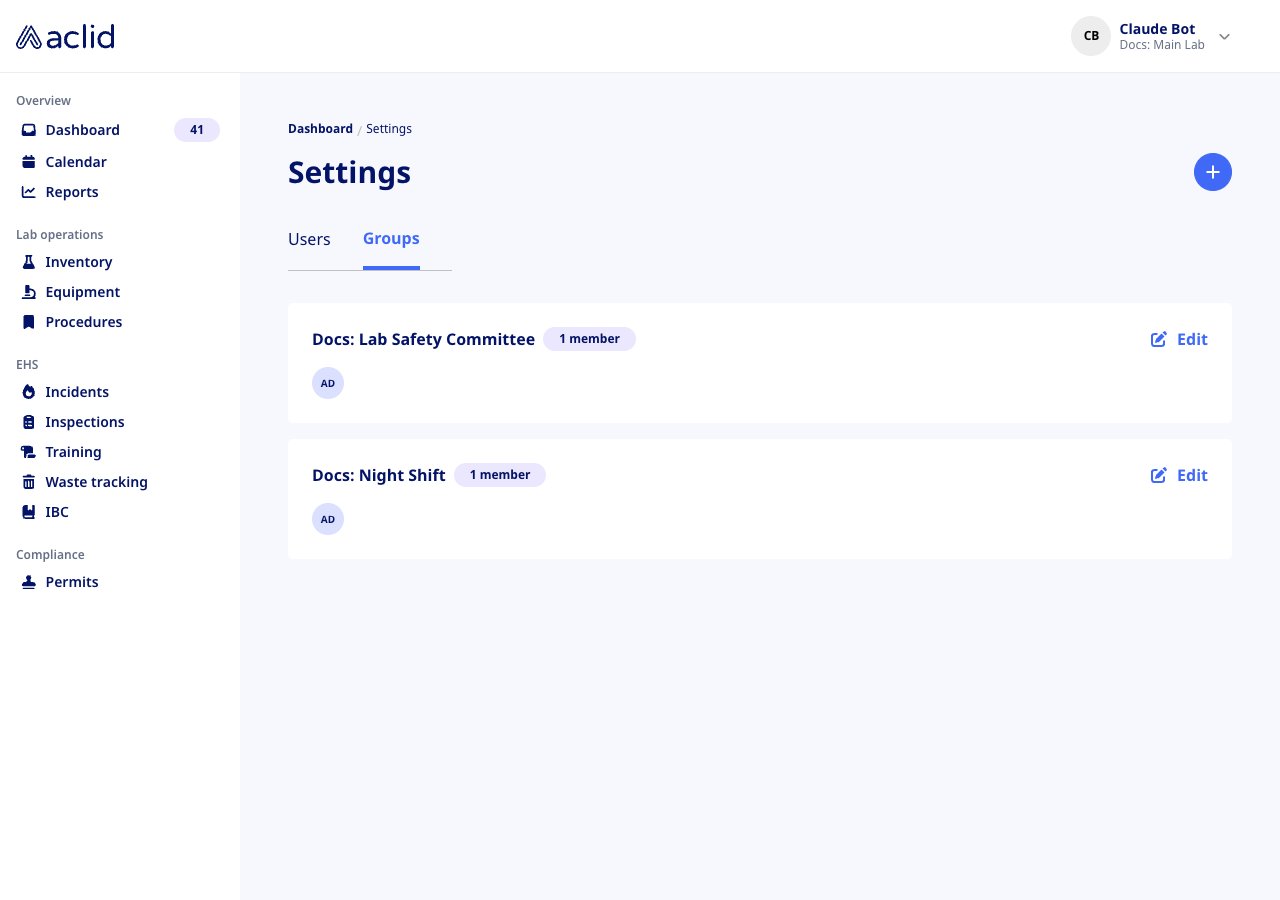
The Groups tab: one card per group with its member count and avatars
Change a user’s site access
Admins only.
- On the Users tab, click the person’s row. Their profile opens, with a Settings breadcrumb to come back.
- On the Site access card, click Edit. Edit site access uses the same All or per-site picker as the invitation, with a Role: choice of Member or Admin beneath it. It starts on the role the person already holds and applies to the sites you add next; sites already in the list keep their role. With a single site the dialog offers only the Role: choice for that site.
- Click Save. The card lists each site with the person’s role there, or All with their organization role when they are not limited to particular sites.
Switch between sites in the header
- Click your name at the top right. When the organization has more than one site, the menu starts with Viewing and the current site, then Switch to with All sites and every other site you have access to.
- Pick one. You return to the Dashboard and every list, including the Users tab here, narrows to that site. The name under your own in the header shows which site is in view.
Reading the list
The Users tab is sorted by name and refreshes on its own. While a site is selected in the header, it lists that site’s members plus anyone with access to All sites.- Name: the person’s full name. Click the row to open their profile.
- Role: Admin or Member, the person’s role in the organization.
- Status: always Active; people who have not accepted their invitation are not listed yet.
- Groups: a badge for each group the person belongs to.
Tips and limits
- Send invitation stays disabled until a work email address is entered and, when there are several sites, until site access has been chosen.
- Inviting an email that already has a pending invitation does not send a second one; use Resend invitation in the message that appears.
- A group cannot be renamed or deleted from this page. Create a new group with the right name and move the members across.
- Adding someone to a group assigns them the group’s trainings straight away, so add people to a group only once they should receive its trainings.
- Members cannot open Settings. Invitations are only sent from this page; groups can also be created from a user’s profile.
- The Role chosen at invitation is the person’s role for the whole organization. Site access limits which sites’ records they can reach, and the role at each site decides what they can do there; a person with no particular sites assigned sees the whole organization with their organization role.
Related
- Roles and sites explains the admin and member roles and how site access narrows what a user sees.
- UserGroup, users, inviteUserToOrg and createUserGroup in the GraphQL reference.